
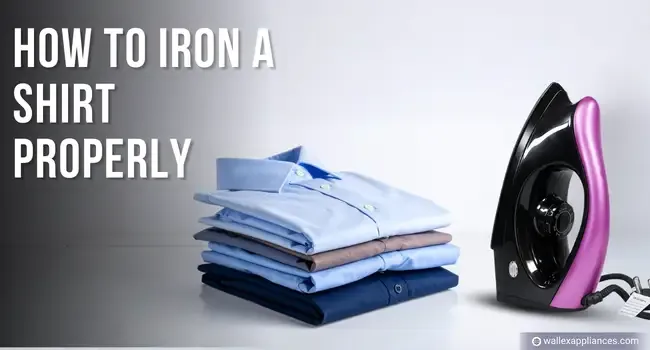
There are two kinds of people; those who go out with crisp, smooth shirts and those who look like they slept in their shirts. If you are also one of those people who have this question about how to press shirt, then good news this guide is for people like you.
Understanding how to iron a shirt correctly is very important as it makes your clothes look sharper, cleaner, more purposeful.
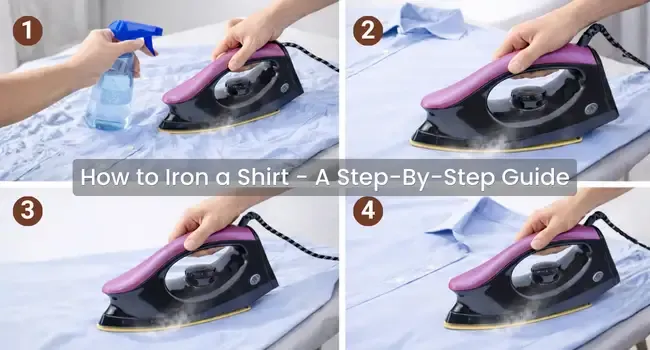
Before we start explaining how to iron a shirt lets us quickly understand where most of the mistakes are made. Most ironing disasters are not caused by laziness. They come from rushing. People tend to crank up the heat to the max, push randomly and put more effort in when the wrinkles don't go away. But ironing clothes doesn't have to do with force - it has to do with sequence, moisture and temperature. Steam relaxes fibers. Order prevents re-wrinkling. Technique saves time.
Pro Tip: Moisture makes the fibres soft so the wrinkles shatter easily. Dry fabric fights back. Damp fabric cooperates.
Always iron from small sections to large sections:
Collar - Cuffs - Sleeves - Shoulders - Body
If you try to start with big pieces first you will wrinkle them again when you are handling small pieces. Professionals stick to this order as it helps them avoid reworking the garments and helps keep the shirt crisp throughout.
Collar First: It is always better to start with a collar, now place the collar down with the underside up. Iron from the tips towards the center. Flip and repeat on the top. Ironing inward prevents the folds and air bubbles.
Cuffs Next: Once you are done with the collars move to cuffs start by unbuttoning and placing them flat. It's helping if you press inside first and then outside. If cuffs have pleats, iron around them as opposed to flattening out the cuffs to get structure.
Sleeves Next: Now move on to the shirt sleeves and lay them flat with seam aligned. Due with the arm/shoulder down to the cuff with long strokes of iron. If you don't want a crease, rotate the sleeve so that you're not pressing the edge flat.
Shoulder Area: Utilize the narrow area of the board for ironing shoulders of the shirt, place the shoulder over the narrow end of the board and rotate over gently as you iron. Don't force it flat. You're shaping fabric, and not flattening it.
Body Panels: Start with one front panel. Work top to bottom. Use light pressure and steam. Then iron the back then the other front panel. Glide on buttons instead of over them.
Hang Immediately Hang the shirt immediately. The help of gravity helps in removing any leftover micro-wrinkles. Folding a freshly pressed shirt immediately ruins your work.
Different fabrics are affected differently by heat.
Cotton: High heat + steam. Easy to iron.
Linen: Requires high heat and moisture; iron while damp.
Polyester: Low heat only. High heat melts fibers.
Silk: Low heat, inside out, minimal steam.
Blends always follow the low est heat fabric in the mix.
When in doubt start low on heat and go up slowly. Heat damage occurs fast and is irreversible.
The biggest mistake however is impatience. Ironing rewards steady, controlled movement -- not speed.
Short on time? Try these shortcuts:
Visible-area method: Iron collar, cuffs and front if you'll wear a jacket.
Steam hang: Hang shirt up in bathroom while showering in hot water to eliminate light wrinkles.
Damp cloth press: Put damp cloth on the wrinkle and press once.
Batch ironing: Iron multiple shirts at once to avoid the hassle of setting up a new batch of shirts.
Efficiency isn't being in a hurry. It's about rhythm.
Understanding these truths changes results on the spot for the better.
A pressed shirt has nonverbal messages for the people that you meet. People tend to imagine well-dressed people as reliable, attention to detail, and professional people. Perception is made by appearance consciously or unconsciously.
A better iron shirt touches your feelings, and makes you feel comfortable. Smooth pressed clothes are also found to boost confidence and alertness. You stand straighter. Move differently and speak with more certainty.
A well ironed shirt is not just a simple cloth only; it is a presentation.
It is not only that ironing is visual, but it is also sensory.
When the three cues are aligned then, you are doing it right and your ironing technique is working.
Remember this phrase:
Small - Narrow - Curved - Large
That's your ironing order:
Collar- Cuffs- Sleeves- Shoulders Body.
Go by it and you will never get lost in the middle.
Let us understand the situation when you need skip ironing:
Heat mistakes become permanent. Fix issues first, then iron.
Ironing seems to be something surprisingly relaxing. Steam rises. Wrinkles vanish. Clothes turn into a crunch in a few seconds. There are not many daily activities that could provide such visible results.
It is strange how that change is gratifying.
It is not about perfection learning how to press a shirt at home, rather, it is about control. When you know the sequence, the temperature, and technique, then ironing is quicker, less cumbersome, and even pleasurable.
Then next time you take one of the irons, take your time. Work section by section. Heavy lifting should be done by steam. Glide through the wrinkles not fight, but out.
Since a well pressed shirt does not simply make your clothes look good. It changes how you walk into a room.
Ans: Iron in the correct order—collar → cuffs → sleeves → body—while the shirt is slightly damp and using steam. Work in long strokes instead of short scrubs, and hang it immediately after ironing to let gravity smooth the rest.
Ans: Set the iron to high heat with steam. Iron the shirt while it’s slightly damp, press from small sections to large, and use steady strokes. Cotton tolerates heat well, so steam is your best tool for quick wrinkle removal.
Ans: Yes. Water (steam or light spray) helps relax fabric fibers, making wrinkles release faster and reducing the need for heavy pressure or repeated passes.